https://timlarison.com/quantum-jumps-book-review/ Este artigo tem como objetivo explicar como instalar o Grid para Implementação do ASM para o Banco de Dados 11gR2.
Vamos usar para a disponibilização dos discos para o ASM o “ASMLIB”.
Primeiramente com o usuário “root” devemos instalar os pacotes do “ORACLEASM” para após criarmos os discos no “ASMLib”.
https://drsurdis.com/massage-therapy/ Na Media (DVD) do Oracle Linux 5.7 32 Bits devemos verificar os pacotes para o ASM conforme abaixo.
Order Clonazepam Online [root@serveroracle ~]# cd /media/OL5.7\ i386\ dvd\ 20110728/Server/ [root@serveroracle Server]# ls -l *asm* -rw-r--r-- 1 oracle root 16398 Nov 17 2010 ibmasm-3.0-9.i386.rpm -rw-r--r-- 1 oracle root 11008 Nov 17 2010 ibmasm-xinput-2.1-1.el5.i386.rpm -rw-r--r-- 1 oracle root 360223 Nov 17 2010 nasm-0.98.39-3.2.2.i386.rpm -rw-r--r-- 1 oracle root 535164 Nov 17 2010 nasm-doc-0.98.39-3.2.2.i386.rpm -rw-r--r-- 1 oracle root 58192 Nov 17 2010 nasm-rdoff-0.98.39-3.2.2.i386.rpm -rw-r--r-- 1 oracle root 131326 Jul 26 2011 oracleasm-2.6.18-274.el5-2.0.5-1.el -rw-r--r-- 1 oracle root 132189 Jul 26 2011 oracleasm-2.6.18-274.el5debug-2.0.5 -rw-r--r-- 1 oracle root 131420 Jul 26 2011 oracleasm-2.6.18-274.el5PAE-2.0.5-1 -rw-r--r-- 1 oracle root 128872 Jul 26 2011 oracleasm-2.6.18-274.el5xen-2.0.5-1 -rw-r--r-- 1 oracle root 84948 Apr 6 2011 oracleasm-support-2.1.7-1.el5.i386. [root@serveroracle Server]#
see Vamos verificar o Kernel do Sistema Operacional conforme abaixo.
Devemos verificar para não haver conflitos da versão do Kernel na hora da instalação do Pacote.
Buy Ultram Online [root@serveroracle Server]# uname -a Linux serveroracle.localdomain 2.6.18-274.el5 #1 SMP Mon Jul 25 13:06:57 EDT 201 [root@serveroracle Server]#
Zolpidem Online Order Conforme informação acima a versão do nosso Kernel é 2.6.18-274.el5, no qual, é compatível com os pacotes:
– oracleasm-support-2.1.7-1.el5.i386.rpm;
– oracleasm-2.6.18-274.el5-2.0.5-1.el5.i686.rpm;
– oracleasmlib-2.0.4-1.el5.i386.rpm; (Este nos precisamos baixar do site da Oracle pois não há na media do DVD do Linux).
Oracle ASMLib
Purchase Tramadol Without Prescription Vamos instalar os pacotes do Oracle ASM.
Order Xanax No Prescription [root@serveroracle Server]# rpm -Uvh oracleasm-support-2.1.7-1.el5.i386.rpm warning: oracleasm-support-2.1.7-1.el5.i386.rpm: Header V3 DSA signature: NOKEY, Preparing... ########################################### [100%] 1:oracleasm-support ########################################### [100%] [root@serveroracle Server]# rpm -Uvh oracleasm-2.6.18-274.el5-2.0.5-1.el5.i686.rpm warning: oracleasm-2.6.18-274.el5-2.0.5-1.el5.i686.rpm: Header V3 DSA signature: NOKEY, key ID 1e5e0159 Preparing... ########################################### [100%] 1:oracleasm-2.6.18-274.el########################################### [100%] [root@serveroracle ~]# cd /home/oracle/ [root@serveroracle oracle]# rpm -Uvh oracleasmlib-2.0.4-1.el5.i386.rpm warning: oracleasmlib-2.0.4-1.el5.i386.rpm: Header V3 DSA signature: NOKEY, key ID 1e5e0159 Preparing... ########################################### [100%] 1:oracleasmlib ########################################### [100%] [root@serveroracle oracle]#
Zolpidem Buy Online Após a instalação do Oracle ASM vamos configurar o ASMLib.
https://destinylootcave.com/spiders-korner-wanted-bounties/ [root@serveroracle oracle]# /etc/init.d/oracleasm configure Configuring the Oracle ASM library driver. This will configure the on-boot properties of the Oracle ASM library driver. The following questions will determine whether the driver is loaded on boot and what permissions it will have. The current values will be shown in brackets ('[]'). Hitting <ENTER> without typing an answer will keep that current value. Ctrl-C will abort. Default user to own the driver interface []: oracle Default group to own the driver interface []: oinstall Start Oracle ASM library driver on boot (y/n) [n]: y Scan for Oracle ASM disks on boot (y/n) [y]: y Writing Oracle ASM library driver configuration: done Initializing the Oracle ASMLib driver: [ OK ] Scanning the system for Oracle ASMLib disks: [ OK ] [root@serveroracle oracle]#
go here Vamos verificar após a configuração do ASMLib o módulo do mesmo.
Order Soma 350Mg Online [root@serveroracle oracle]# lsmod Module Size Used by oracleasm 46356 1 . .
Order Pregabalin Online Vamos criar os discos com o Oracle ASM para o “ASMLib”.
Estes devem estar disponíveis no Sistema Operacional.
go to site [root@serveroracle dev]# /etc/init.d/oracleasm createdisk disk01 /dev/sdb1 Marking disk "disk01" as an ASM disk: [ OK ] [root@serveroracle dev]# /etc/init.d/oracleasm createdisk disk02 /dev/sdc1 Marking disk "disk02" as an ASM disk: [ OK ] [root@serveroracle dev]# /etc/init.d/oracleasm createdisk disk03 /dev/sdd1 Marking disk "disk03" as an ASM disk: [ OK ] [root@serveroracle dev]# /etc/init.d/oracleasm createdisk disk04 /dev/sde1 Marking disk "disk04" as an ASM disk: [ OK ] [root@serveroracle ~]#
https://spareveil.com/shellac-polish-change/ Após criarmos os discos no ASMLib vamos listar os mesmos.
[root@serveroracle ~]# oracleasm listdisks DISK01 DISK02 DISK03 DISK04 [root@serveroracle ~]#
Vamos instalar o Grid. Veja passo a passo nas imagens abaixo do artigo a Instalação do Oracle Grid 11g R2.
Este deve estar baixado do site da Oracle e já descompactado no seu servidor.
Segue os links para baixar o Oracle Database 11g Release 2 Grid Infrastructure.
Linux x86
Oracle Download x86
Linux x86-64
Oracle Download x86-64
[oracle@serveroracle app]$ pwd
/u01/app
[oracle@serveroracle app]$ cd grid/
[oracle@serveroracle grid]$ ./runInstaller
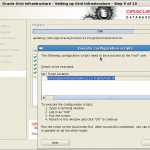
No final da instalação vamos executar com o usuário “root” o script para garantir privilégios para o “root”.
OBS: O Overwrite dos arquivos dbhome, oraenv, coraenv foi solicitado pois o software Oracle já fora instalado antes do Oracle Grid.
[root@serveroracle ~]# /u01/app/oracle/product/11.2.0/grid/root.sh
Running Oracle 11g root.sh script...

The following environment variables are set as:
    ORACLE_OWNER= oracle
    ORACLE_HOME=  /u01/app/oracle/product/11.2.0/grid

Enter the full pathname of the local bin directory: [/usr/local/bin]:
The file "dbhome" already exists in /usr/local/bin.  Overwrite it? (y/n)
[n]: y
   Copying dbhome to /usr/local/bin ...
The file "oraenv" already exists in /usr/local/bin.  Overwrite it? (y/n)
[n]: y
   Copying oraenv to /usr/local/bin ...
The file "coraenv" already exists in /usr/local/bin.  Overwrite it? (y/n)
[n]: y
   Copying coraenv to /usr/local/bin ...


Creating /etc/oratab file...
Entries will be added to the /etc/oratab file as needed by
Database Configuration Assistant when a database is created
Finished running generic part of root.sh script.
Now product-specific root actions will be performed.
2012-01-31 21:41:46: Checking for super user privileges
2012-01-31 21:41:46: User has super user privileges
2012-01-31 21:41:46: Parsing the host name
Using configuration parameter file: /u01/app/oracle/product/11.2.0/grid/crs/install/crsconfig_params
Creating trace directory
LOCAL ADD MODE
Creating OCR keys for user 'oracle', privgrp 'oinstall'..
Operation successful.
CRS-4664: Node serveroracle successfully pinned.
Adding daemon to inittab
CRS-4123: Oracle High Availability Services has been started.
ohasd is starting
ADVM/ACFS is not supported on oraclelinux-release-5-7.0.2

serveroracle     2012/01/31 21:42:15     /u01/app/oracle/product/11.2.0/grid/cdata/serveroracle/backup_20120131_214215.olr
Successfully configured Oracle Grid Infrastructure for a Standalone Server
Updating inventory properties for clusterware
Starting Oracle Universal Installer...

Checking swap space: must be greater than 500 MB.   Actual 4094 MB    Passed
The inventory pointer is located at /etc/oraInst.loc
The inventory is located at /u01/app/oraInventory
'UpdateNodeList' was successful.
[root@serveroracle ~]#
Pronto instalamos o Oracle Grid 11g R2. Caso não instalado o Oracle Software, instale o mesmo e crie o Banco de Dados com o “DBCA”.
Pós instalação
Com o usuário Oracle vamos verificar o ASM e Baixar o ASM.
Para conectar no Grid vamos exportar o ORACLE_HOME e ORACLE_SID para o Grid e utilizar o “SYSASM” para conectar na Instância +ASM através do “SQLPLUS”.
[oracle@serveroracle ~]$ ps -ef | grep pmon
oracle    6872     1  0 21:45 ?        00:00:00 asm_pmon_+ASM
oracle    6964  6935  0 21:46 pts/4    00:00:00 grep pmon
[oracle@serveroracle ~]$ export ORACLE_HOME=/u01/app/oracle/product/11.2.0/grid
[oracle@serveroracle ~]$ export ORACLE_SID=+ASM
[oracle@serveroracle ~]$ cd /u01/app/oracle/product/11.2.0/grid/bin/
[oracle@serveroracle bin]$ ./sqlplus

SQL*Plus: Release 11.2.0.1.0 Production on Tue Jan 31 21:49:46 2012

Copyright (c) 1982, 2009, Oracle.  All rights reserved.

Enter user-name: sys/******* as sysasm

Connected to:
Oracle Database 11g Enterprise Edition Release 11.2.0.1.0 - Production
With the Automatic Storage Management option

SQL> shutdown immediate
ASM diskgroups dismounted
ASM instance shutdown
SQL> disc
Disconnected from Oracle Database 11g Enterprise Edition Release 11.2.0.1.0 - Production
With the Automatic Storage Management option
SQL> exit
[oracle@serveroracle bin]$ ps -ef | grep pmon
oracle    7018  6935  0 21:51 pts/4    00:00:00 grep pmon
[oracle@serveroracle bin]$
Vamos verificar o status do Grid e vamos configurar o mesmo para iniciar automaticamente.
Antes devemos exportar o ORACLE_HOME e o ORACLE_SID para o GRID. Criei um arquivo .oracle_asm.sh para Setar as Variáveis de Ambiente para o Grid.
Segue o mesmo abaixo:
[oracle@serveroracle ~]$ cat .oracle_asm.sh
### Variaveis do ASM
export ORACLE_BASE=/u01/app/oracle
export ORACLE_HOME=$ORACLE_BASE/product/11.2.0/grid
export ORACLE_SID=+ASM
export PATH=$PATH:$ORACLE_HOME/bin
export TNS_ADMIN=$ORACLE_HOME/network/admin
[oracle@serveroracle ~]$
Verificando o Status e modificando o mesmo para iniciar automaticamente.
[oracle@serveroracle ~]$ crsctl status resource ora.orcl.db
NAME=ora.orcl.db
TYPE=ora.database.type
TARGET=OFFLINE
STATE=OFFLINE
[oracle@serveroracle ~]$ crsctl modify resource ora.orcl.db -attr AUTO_START=always
Significado de cada valor do Parâmetro AUTO_START.
– always: Reinicia o recurso quando o servidor reinicia idependentemente do estado dos recursos quando o servidor parou.
– restore: Restaura o recurso para o mesmo estado que estava quando o servidor parou. Oracle Clusterware tenta reiniciar o recurso se o valor do parâmetro TARGET estava ONLINE antes do servidor parar.
– never: Oracle Clusterware nunca reinicia o recurso idependentemente do estado do recurso quando o servidor parou.
Vamos reiniciar o servidor.
[root@serveroracle ~]# reboot

Broadcast message from root (pts/0) (Mon Feb  6 10:22:45 2012):

The system is going down for reboot NOW!
[root@serveroracle ~]#
Após reiniciado o Servidor vamos verificar o Status da Inicialização Automática do Grid.
[oracle@serveroracle ~]$ crsctl status resource ora.orcl.db -p | grep AUTO_START
AUTO_START=always
[oracle@serveroracle ~]$ crsctl status resource ora.orcl.db
NAME=ora.orcl.db
TYPE=ora.database.type
TARGET=ONLINE
STATE=OFFLINE

[oracle@serveroracle ~]$ crsctl status resource ora.orcl.db
NAME=ora.orcl.db
TYPE=ora.database.type
TARGET=ONLINE
STATE=ONLINE on serveroracle

[oracle@serveroracle ~]$ ps -ef | grep pmon
oracle    3787     1  0 10:26 ?        00:00:00 asm_pmon_+ASM
oracle    3875     1  0 10:27 ?        00:00:00 ora_pmon_orcl
oracle    3964  3701  0 10:28 pts/0    00:00:00 grep pmon
[oracle@serveroracle ~]$
Para baixar todos os recursos do Oracle Clusterware basta exportar o ORACLE_HOME e o ORACLE_SID para o Grid e executar o Comando abaixo:
Deve certificar que todos os recursos estão baixados após a parada dos recursos do Clusterware.
[oracle@serveroracle ~]$ cat .oracle_asm.sh
### Variaveis do ASM
export ORACLE_BASE=/u01/app/oracle
export ORACLE_HOME=$ORACLE_BASE/product/11.2.0/grid
export ORACLE_SID=+ASM
export PATH=$PATH:$ORACLE_HOME/bin
export TNS_ADMIN=$ORACLE_HOME/network/admin
[oracle@serveroracle ~]$ ps -ef | grep pmon
oracle    4587     1  0 10:44 ?        00:00:00 asm_pmon_+ASM
oracle    4676     1  0 10:45 ?        00:00:00 ora_pmon_orcl
oracle    4772  4345  0 10:47 pts/0    00:00:00 grep pmon
[oracle@serveroracle ~]$
Parando todos os recursos.
[oracle@serveroracle ~]$ crsctl stop resource -all
CRS-2673: Attempting to stop 'ora.diskmon' on 'serveroracle'
CRS-2673: Attempting to stop 'ora.LISTENER.lsnr' on 'serveroracle'
CRS-2673: Attempting to stop 'ora.DGARCH.dg' on 'serveroracle'
CRS-2673: Attempting to stop 'ora.DGDATA.dg' on 'serveroracle'
CRS-2673: Attempting to stop 'ora.DGREDOA.dg' on 'serveroracle'
CRS-2673: Attempting to stop 'ora.DGREDOB.dg' on 'serveroracle'
CRS-2673: Attempting to stop 'ora.orcl.db' on 'serveroracle'
CRS-2677: Stop of 'ora.diskmon' on 'serveroracle' succeeded
CRS-2677: Stop of 'ora.LISTENER.lsnr' on 'serveroracle' succeeded
CRS-2677: Stop of 'ora.DGARCH.dg' on 'serveroracle' succeeded
CRS-2675: Stop of 'ora.DGDATA.dg' on 'serveroracle' failed
CRS-2677: Stop of 'ora.DGREDOB.dg' on 'serveroracle' succeeded
CRS-2677: Stop of 'ora.DGREDOA.dg' on 'serveroracle' succeeded
CRS-2677: Stop of 'ora.orcl.db' on 'serveroracle' succeeded
CRS-4000: Command Stop failed, or completed with errors.
[oracle@serveroracle ~]$ ps -ef | grep pmon
oracle    4587     1  0 10:44 ?        00:00:00 asm_pmon_+ASM
oracle    4816  4345  0 10:49 pts/0    00:00:00 grep pmon
[oracle@serveroracle ~]$
Podemos perceber que o Oracle Clusterware não parou todos os recursos, observando o “ora.DGDATA.dg” o mesmo falhou e a Instância “+ASM” ainda está Ativa.
Neste caso vamos executar novamente o comando.
[oracle@serveroracle ~]$ crsctl stop resource -all
CRS-2500: Cannot stop resource 'ora.DGARCH.dg' as it is not running
CRS-2500: Cannot stop resource 'ora.DGREDOA.dg' as it is not running
CRS-2500: Cannot stop resource 'ora.DGREDOB.dg' as it is not running
CRS-2500: Cannot stop resource 'ora.LISTENER.lsnr' as it is not running
CRS-2500: Cannot stop resource 'ora.diskmon' as it is not running
CRS-2500: Cannot stop resource 'ora.orcl.db' as it is not running
CRS-2673: Attempting to stop 'ora.DGDATA.dg' on 'serveroracle'
CRS-2677: Stop of 'ora.DGDATA.dg' on 'serveroracle' succeeded
CRS-2673: Attempting to stop 'ora.asm' on 'serveroracle'
CRS-2677: Stop of 'ora.asm' on 'serveroracle' succeeded
CRS-2673: Attempting to stop 'ora.cssd' on 'serveroracle'
CRS-2677: Stop of 'ora.cssd' on 'serveroracle' succeeded
CRS-4000: Command Stop failed, or completed with errors.
[oracle@serveroracle ~]$ ps -ef | grep pmon
oracle    4833  4345  0 10:49 pts/0    00:00:00 grep pmon
[oracle@serveroracle ~]$
O erro reportado acima “CRS-4000” é devido aos recursos que não estavam sendo executados.
Pronto instalamos o Oracle Database 11g Release 2 Grid Infrastructure.
Mais informaçõe acesse a Documentação do Oracle.
- Tela Inicial de Instalação do Grid.
- Tela de escolha da Linguagem.
- Tela de criação dos Discos de Grupo do ASM
- Tela de Senhas do ASM
- Tela de Senhas do ASM. Aviso caso a senha seja fraca.
- Tela de Seleção dos Grupos de Usuários do Sistema Operacional para o ASM.
- Tela de aviso dos Grupos de Usuários do Sistema Operacional. Clique em “Yes”.
- Tela dos Caminhos para Instalação do Grid.
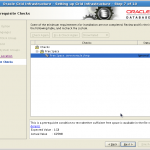
- Tela de processo de Check dos pré-requisitos para a Instalação do Grid.
- Como estou instalando em um ambiente de teste eu ignorei, porém deve estar tudo certo para a instalação.
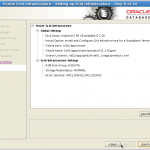
- Tela do Sumário da Instalação.
- Tela do Processo de Instalação.
- Tela da Execução do Script “root”.
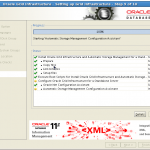
- Tela de Configuração do Oracle Grid.
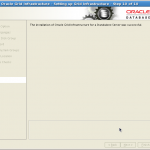
- Tela da Finalização da Instalação do Oracle Grid.
Autor: Maycon Tomiasi
Formado em Tecnologia da Informação na FIPP (Faculdade de Informática de Presidente Prudente), Analista DBA Oracle pela Teiko Soluções em Tecnologia da Informação, residente em Blumenau/ SC, Certificado OCP 10g/11g/12c, OCS 11g Implementation, OCE 11g Performance Tuning, OCE 11g RAC & GRID e OPN Specialist. Conhecimentos em PHP.


